The first step to link your activity to the corresponding project is to start configuring the work projects.
Settings > Projects > Configure Projects 🔗
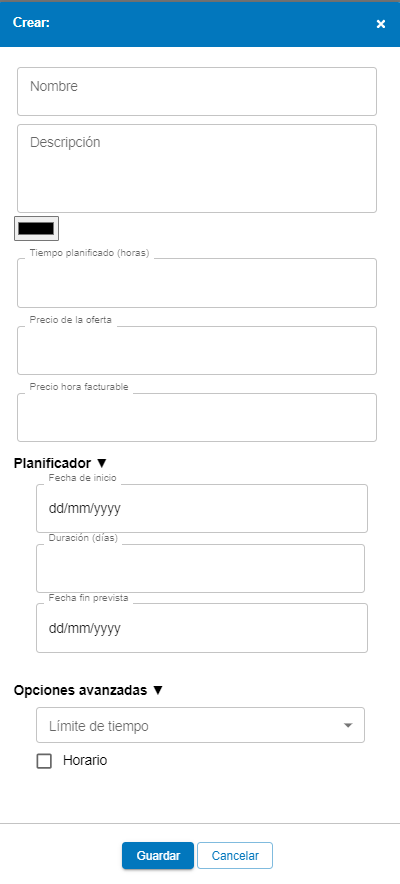
Click the "Create project" button

On the right, a window will open with the different options to configure the project:
- Project name
- Project description
- Color : choose a color to illustrate the project
- Time limit: define if you want to limit a maximum number of minutes per day for that project. For example, if you select 60 minutes, the activity on the project will be deducted as you work on it until this time limit is exhausted. Once the daily time is consumed, the project will disappear from the WorkProject dropdown.
- Schedule: define a time range during which the project can or cannot be selected from the application icon. For example, if you limit the project schedule from 10:00 to 17:00, it means that neither before 10:00 nor after 17:00 activity can be reported to that project.
- Planned time (h): represents the hours you plan to dedicate to that project and is used to calculate deviations between your initial forecasts and the actual results collected by WorkProject and shown in the "Forecasts" panel. Enter an amount in hours.
- Expected date: defines a delivery or completion date for the project. Like the planned time, it is used later to calculate deviations.
- Billable hour price: represents the price you will charge for each hour dedicated to the project and helps you easily calculate the billing for that project. It is used to calculate costs and profits in the "Financial data" panel. Enter an amount in your corresponding currency, euros (€), dollars ($), etc. IMPORTANT: if you fill in this field, the information will prevail when calculating the project's margins and profits, so the billable hour entered in the employee settings will not be taken into account. If left blank, the tool will use the billable hour information from your employees when calculating profitability and margins.
Note: when we assign a project or task to a user or workgroup, it will be inherited downwards, that is, both the task and the subtask.
How to assign projects to employees and/or workgroups 🔗
Once you have the projects created, you must assign them to the corresponding employees or groups.
- Click on the icon if you want to add employees individually or on to add an entire workgroup.
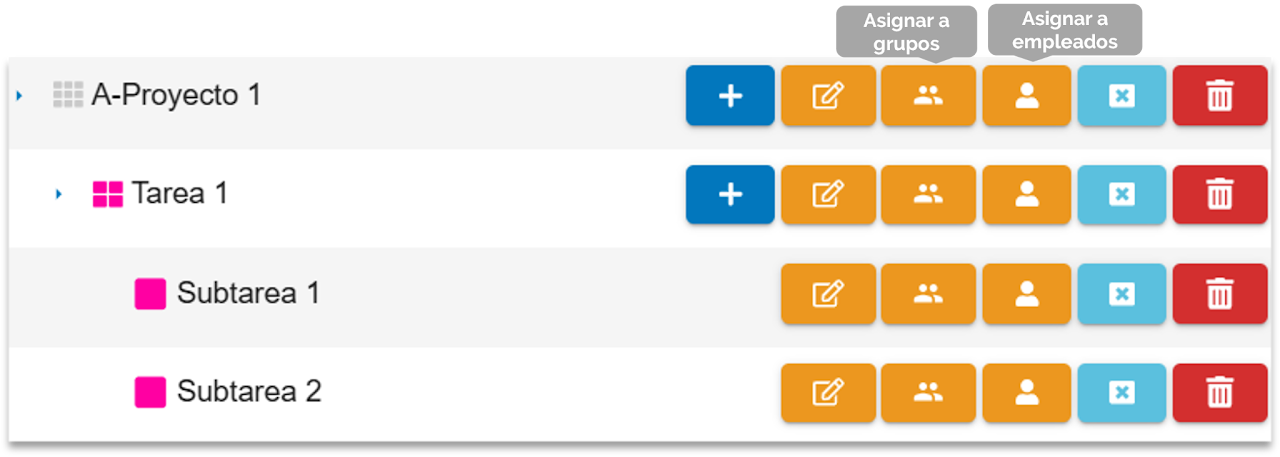
- Depending on what you choose, all the employees in the organization or all the created workgroups will be shown.
- Manually select the employees or groups to which you want to assign the task (changes are saved in real time).
Remember to use the employee search to filter results.
We can find the option for Project Packages, which allows creating project assignment rules (APS) and assigning them to groups to have centralized rules.
Close/open projects 🔗
Created projects can be opened and closed according to the needs of the group/employees assigned to them. If a project is going to be temporarily unused and we do not want to lose its configuration or the rules assigned for its activation, instead of deleting it and losing all this history, we can simply close it and reopen it when it becomes necessary again.
In case you want to create a project, we will press the cross icon.

To view the projects we have closed, we must activate the "View closed" option and press the play symbol.


Tasks and subtasks 🔗
WorkProject allows you to add tasks and subtasks to the work projects you already have created. Tasks are housed within projects and can help you divide those projects into smaller actions or processes. In turn, you can add different subtasks to your tasks. To edit or add groups, it is necessary to activate the projects module.
This functionality of WorkProject is especially useful if different tasks or processes are carried out within the same project that you want to analyze in detail, allowing you to better track the activity of your projects, as well as a more thorough analysis.
We show you with the following example:
- The main project is "Social Marketing"
- There are 3 tasks that depend on it: Facebook, Linked I n and Twitter
- And within each of these tasks, there are different subtasks called "ADS Campaigns" and "Create content"

Create tasks or subtasks for a project 🔗
- Go to Settings > Projects > Configure projects
- Click on the project icon to which you want to add a task (if the task is for a new project, you must create it first) or a subtask (by expanding the project and selecting the corresponding task icon).
- Enter the name of the task or subtask. As you type, autocomplete will show you tasks already created that you can select to avoid duplicates. This way, you can later analyze the information in case a task is repeated across different projects.
- Optionally, you can also fill in the rest of the information (description, color, planned time, billable hourly rate, etc.).
- Click save to save the task or subtask.


Your task will be created immediately and you can start selecting it in your project list. If you want to edit an already created task, just click on the icon to modify the information.

Assign tasks or subtasks to users or groups 🔗
- Locate the task/subtask you want to assign by expanding the task list of the project you are interested in. Remember that you can use the search bar to filter results for both projects and tasks/subtasks.


- Click if you want to add individual employees or to add an entire work group.
- Depending on your choice, all employees in the organization or all work groups you have created will be shown.
- Manually select the employees or groups you want to assign the task to (changes are saved in real time).
Note: when we assign a task or subtask to a user or work group, it will be inherited upwards, meaning both the new task and the entire project will be assigned.
Select and switch between project or tasks 🔗
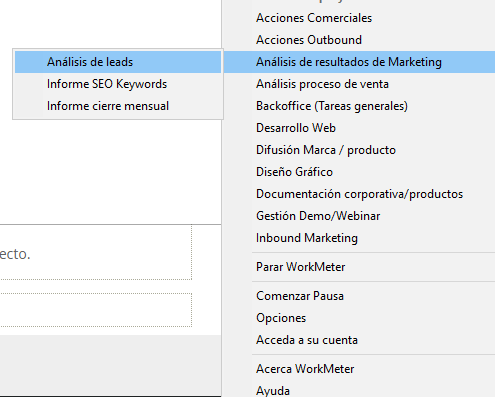
In WorkProject it is very easy to select the projects or tasks you are working on. Simply right-click on the WorkProject icon and select the one you need by clicking again.
If you need to report on a specific task/subtask, you must first find the project they are associated with and then move the mouse over it until the list of tasks for that project appears. Select the one you are interested in and click again to save the changes.
You can edit projects and activity separately, to learn how to do it go to "Settings > General Options" .